The following section explains how to add new content to the website and lists the different types of content that can be added.
To add new content to the website, click on the "+" ( ) button that appears on the "Pages" window.
If you wish to add new content to an existing category, click on the category in the Pages window using the right mouse button and select "Add to Category" ( ). An identical menu will appear regardless of your selection.
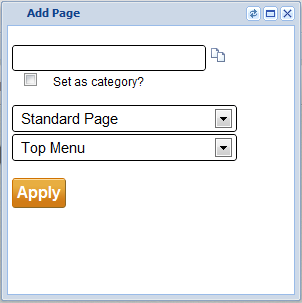
After selecting all of the items that are not links (which will be explained below), the following window will appear:
Type the name of the page to be added in the text field. Click on the "Add More Pages" (indicated by a red circle in the image) in order to create multiple identical pages. Selecting "Personal Templates" give the user the option of creating pages with pre-defined default information . Click the "Apply" button to approve the content that has been generated.
-
Standard Page – Generate a new content page at the selected location
-
Product – Generate a new product page at the selected location. It should be noted that in accordance with the official requirements for a valid online store structure, products should be placed under the products category, and no other. In addition, the hierarchic structure should be maintained and product categories and the products themselves should not be placed at the same hierarchic level.
-
Blog Post – Generates a new post to a blog at the selected location.
-
Article –Written content constituting an article should be placed in the Articles section, located under the Designated Articles category in order to improve the ability to scan content.
Please note that selecting the "Set as Category" checkbox will change the selected page to a category.
Adding Summary Pages
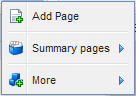
Summary pages are special pages which present special sections and views in order to help the website owner display the latest changes to the site. These pages can be added by clicking on the arrow next to the "+" button, as shown in the image below:
Next, select "Summary Pages" from the menu in order to display the following options:
-
Blogs – displays a list of all of the different blogs on the website
-
Products – displays all of the products available at the store, arranged from the first product entered to the most recent one.
-
Recently added products – displays all of the products available at the store, arranged from the most recently entered products to the first one entered.
-
Discount products – displays all of the products defined as "Discount Products".
-
Articles - displays all of the articles on the website
Adding Advanced Pages using the "More" menu
This menu enables the user to add direct links to specific items to the website's menus. These pages can be added by clicking on the arrow button next to the "+" button, as shown in the image below:
Next, select the "More" menu, to access the following options:

-
Add Album – Place a link to an existing album on the website, create a new album (directly from this window) or place a link to the page containing all of the albums on the website.
-
Add Form – Display a direct link to a form from this menu, or create a new form directly from this location.
-
Add URL – Places a direct link in the website's menus. In the Add window, select the name of the page, the path and whether the link should be opened in a separate window.
-
Add Forum – Add a new forum to the website's menus (can be added directly from this window) or a link to an existing forum.
-
Add Survey – Add a link to an existing survey on the site or generate a new survey.
-
Add Sitemap – Place a special page on the menu that includes a map of all of available pages on the website.
-
Add Guestbook – Place a special page on the menu that website users can use to provide feedback about the website.
-
Add Members Login Page – Enables website owners running social networks (including pages that are restricted to members of the network or forum members) to place a direct link to their sign-in pages.
-
Add “Sign Up to Mailing List” Page – Enables website owners who send messages to mailing lists to place a direct link to the registration page, through which users can enter their email addresses.
-
Add Calendar – Enables adding a link to an existing calendar or generating a new one – directly from the menu.
-
Add Link to Shopping Cart – Places a special page on the menu which displays the content of the user's shopping cart.

 English
 Español
 Deutsch
 Français
 Pусский
 العربية
 हिंदी
हिंदी Italiano
 日本の
日本の Português
 עברית
עברית