This page is used to add a new form to the website, define general definitions for the form and define how it is used.
General Form Definitions
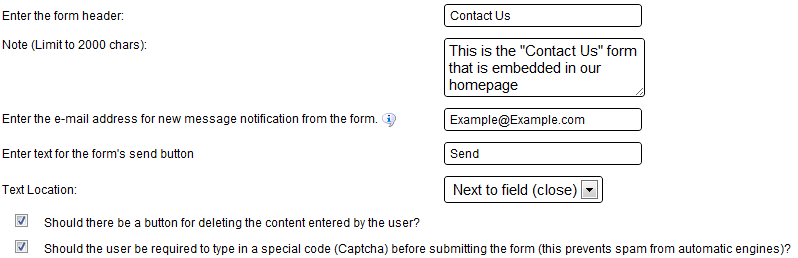
In this section, the user can define several general definitions.
-
Type the name of the form in the "Enter the Form" Header field. We recommend giving the form a meaningful title which will give the website owner actual information about the source of the request. Use names such as "Online Contact Form" or "Form appears on landing page".
-
The "Note" field allows the user to enter internal comments related to the form. This information will not be visible to users visiting the website.
-
The field entitled "Enter the e-mail address for new message notification from the form" allows website owners to enter an email address to receive reports on forms received and their content. Two email addresses can be entered separated by a semi-colon (;).
-
The "Enter text for the form's send button" field allows the user to define the text that will appear on the Send button.
-
The page has two checkboxes: Selecting Should there be a button for deleting the content entered by the user? will display a Clear button next to the Send button on the form, if the website owner decides to give the user the option of clearing fields that have been entered; and a checkbox asking Should the user be required to type in a special code (Captcha) before submitting the form?, which, when checked, will cause a numeric code to be displayed below the form, preventing the form from being submitted, if the code is not entered (preventing spam through forms).
Build your form quickly and easily by choosing from premade templates
This option allows website owners to select a template, which predefines the fields for their forms. Templates have been defined for commonly-used types of forms such as a simple contact form, advanced contact form or petition.
Selecting a template will save the time invested in defining fields later on in the process and allows the user to edit the automatically generated fields.
Message upon submitting the form
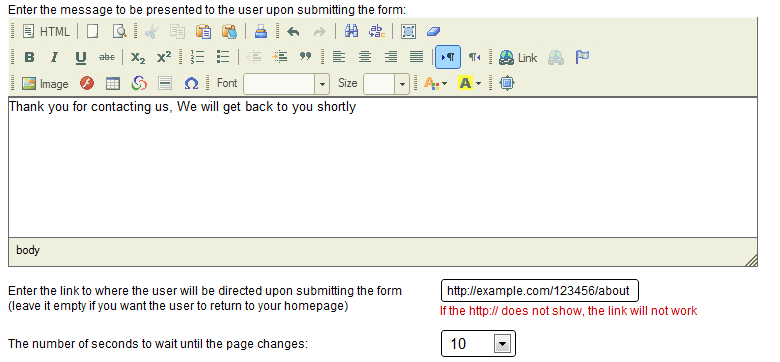
This section allows users to perform operations after submitting the form.
First, a message which will be displayed to the user after a form is filled out can be defined using the editing interface – for example, inserting a company logo or adding "Thank you for contacting us, we'll respond as soon as possible". If a conversion code is required, it should be placed at the "source" of this location.
Below the editor is a field in which a URL can be entered. The user will be directed to this link upon submitting the form. By default, the user is directed to the website's homepage, but this tool can be used to direct the user to a different site (for example, while filling out a series of forms).
The period of time to wait before automatically transferring the user to the homepage or selected URL can also be defined. The default time is three seconds. A longer period of time can be defined or automatic redirection can be disabled.
Next, the option of entering a mobile phone number is given. Text messages will be sent to the number entered, notifying the website owner of a new form received on the website. The received form notification that is sent does not include any information about the form. This can be accessed through email or on the website itself.
Form Design
This section allows the user to select general definitions for the form's design. The following properties can be defined:
Form background color and Form text color – define this information for the form if the form is displayed on a separate page (not as part of an existing page, in which case this information must be defined using the Add interface).
CSS Button Style - allows advanced users to insert a unique CSS code which changes the Send Message button's design.
Should the buttons of the form be displayed within the same line as the last field of the form? - This checkbox gives website owners the option of creating a horizontal form in which the send and clear buttons appear on the same line as the form's last field.
Frame
The form's frame can be defined in this section: select the desired frame width, color and border between fields (in addition to the form's border).
These options are available if the form is displayed on a separate page (not as part of an existing page).
Login Authorization
Access to the form can be restricted from this section, if the form is displayed on a separate page and not as part of an existing one. It can be restricted to website members-only, can be protected by a password or both options can be combined.
Adding Fields
After all of the form's properties have been defined, click on the button that says Update the form details and move on to the next step in order to create the fields.
Creating fields in a form
After all of the definitions have been entered, or when clicking on Add/Edit Fields for any form, a window will appear displaying all of the different fields, giving the option of adding or editing fields, deleting them and previewing the form as it will appear on the website.
Add Field
Clicking on Add Field will open a window in which a field can be added to the form.
The window contains the following options:
-
Field Type – Select the type of field to add. There are different types of fields available. We recommend researching the different options.
-
Field Title – Text describing the field as it appears alongside the field.
-
Place – The field's numeric location in relation to other fields on the form
-
Required Field – a checkbox which defines if the user is required to fill out this field. Checking this box adds an asterisk next to the field name on the form.
-
Display on the same line – defines if the field should be displayed on the same line as the previous field or on a new line.
-
CSS Style – gives advanced users the option of defining a code. See the tip below for more information.
Tip
The Style field receives CSS-language commands applying to the different fields. For example, entering width:100px will define a field width of 100 pixels. Height can be defined by height:40px (40 pixels in this example). In addition, the owner can control different background options, define border properties and more. Different field types support different options – read information on code-training websites to understand the specific properties that apply to each field type.
There are two important things to remember about the Email field type:
-
Using this field type effectively prevents spam on the website. Defining a field as Email (as opposed to Text) will cause the system to run an inspection and not accept forms in which this field does not contain a properly formatted email address (a@b.c)
-
This field supports the option of converting the form into a mailing list. Selecting this option will define the entire form as a mailing list registration form and will enable the option of sending messages to users that register using this form.
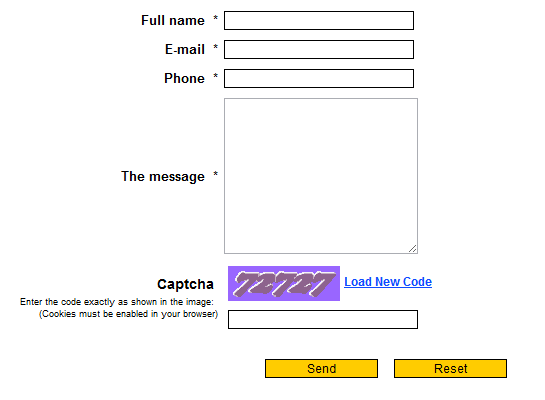
After defining the fields, the page should appear as follows:
Once the fields have been defined, the form is ready to be added to the website – either as a separate page or as part of an existing one.

 English
 Español
 Deutsch
 Français
 Pусский
 العربية
 हिंदी
हिंदी Italiano
 日本の
日本の Português
 עברית
עברית