In this short tutorial we’ll discuss how to manage your website’s domain.
Every website opened in the system has a free subdomain that allows the website owner to display the site online. In this tutorial, we will discuss domain management tools, purchasing a new domain and pointing an existing one and their settings on the website.
Entering the Domain Management System
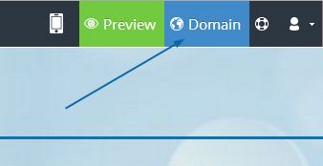
In order to add, change, or manage a domain, click on the Domain button on the top right of the Site manager menu.

Changing your Free Subdomain Address
You can change your subdomain by clicking on Domain >> Change address and inputting the subdomain you wish to have instead of the website ID.

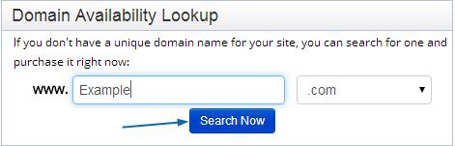
Domain Availability Lookup
You can check if a domain is available in the domain availability lookup.
Click on the Domain button on the top right of the Site manager menu. Enter the domain name you wish to search and click on Search now.
Purchasing a New Domain
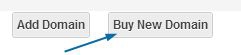
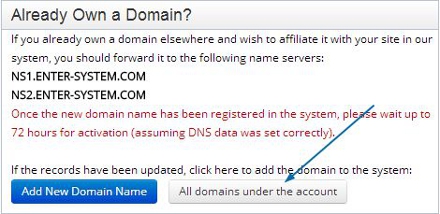
To add a new domain name to your website you’ll need to enter the domain management system by clicking on Domain at the top right corner >> All domains under the account.

It is recommended to purchase a domain from this location since domains purchased here will be automatically linked to the website without requiring any further settings.
Click on Buy New Domain to directly access the domain purchase system.
The window that appears gives the user the option of selecting the domain and relevant extension. When the user clicks on Search Now button the system checks if the domain is available. If so, it can be ordered.
If the requested domain is available, the system automatically displays a window in which the user enters relevant information. The information must be entered completely and accurately or the request will be rejected and the domain will not be ordered. Information must be entered in English only!
To continue, click on Order Now. A shopping cart page opens, listing the ordered items. Once the user selects the preferred payment method from this window and accepts the terms of use, the purchase order is made.
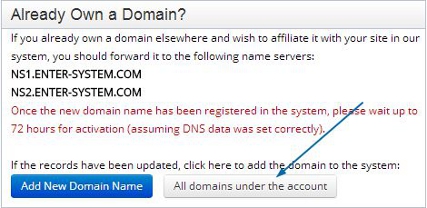
Setting Up a Domain Purchased Through the System
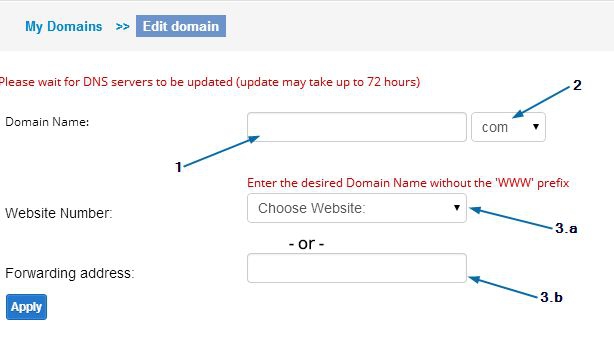
If you wish to connect a domain purchased from the system, go to Domain on the top right >> All domains under the account >> then click on Add domain.


-
Next to Domain Name enter the domain name without the extension
-
Select Domain’s extension from the dropdown list.
-
The domain can be connect to either a website in the system or to a forwarding address.
-
You can connect the domain to a website in the system by selecting the relevant website number next to Website number and then Apply.
-
Enter a forwarding address to redirect the domain to another address. this is useful if you have multiple domains that you wish to point to a single address and then Apply.
The address must be written in this format “http://www.example.com/...” (A 301 redirect).
Setting Up a Domain Purchased from Other Hosts (GoDaddy etc.)
In order to connect an external domain to a website in the system you’ll need to point it to the required servers.
The process of pointing domains is different for users with or without an e-mail account service attached to their domain.
Pointing a domain without e-mail account services:
Users who own a previously purchased domain and wish to use it in their new website must obtain permission from the company from which the domain was purchased to change the domain's name servers to ours.
The name servers that must be defined are:
ns1.enter-system.com
ns2.enter-system.com
After changing the name servers, the domain must be linked to the website as explained on "Setting Up a Domain Purchased Through the System" Above.
Pointing a domain with account services:
Users who own a previously purchased domain and also have an e-mail account service active on their domain will need to point the specific DNS record.
The company hosting the domain must be contacted and asked to change the following DNS records:
A record: 54.76.177.85.
CNAME record with a WWW prefix: round.enter-system.com
After the DNS has been defined, the domain must be linked to the website as explained on "Setting Up a Domain Purchased Through the System" Above.
Important!
All modifications to domain records (A RECORD, DNS, etc.) are updated within 72 hours after the change is made.
Transferring your Domain Management
If you would like to transfer your domain management, you must first contact your current domain provider and input a domain release request to receive a transfer code. Once you have received the transfer code, send an email to your new provider with your domain name, transfer code, and request for domain management transfer.
Forwarding to External Name Servers
In case you would like to point your domain name to external NS servers, please send your request by email. Do not forget to specify the domain name and the target NS servers you would like to point your domain to. The email must be sent from the email set as the email of the website owner (for identification purposes).
Managing your Domain Records
Note
The DNS records are extremely sensitive. One incorrect record could bring down the entire website, and changes might take up to 72 hours to take effect. Therefore it is suggested to consult a professional before implementing any changes to the records.
The system allows you to modify the DNS records only. In order to forward the name servers, please contact us by mail with the correct servers. Name Server forwarding determines 'who's responsible' for making changes. Therefore, a domain that is not managed by our name servers won't be affected by any changes made.
It is possible to forward a specific aspect of the domain's behavior to another service provider, e.g. using our hosting services only, or specifically using our mail server without hosting the site at our web server.
How to access the DNS records?
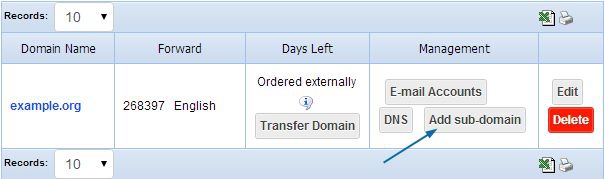
In order to access the DNS records, please go to Domain >> All the domains under the account. There you'll be able to click the DNS button to access the records.

Important records to be aware of:
A-Records - Those are the 'main' records for a domain, responsible for direct access. A-records can be pointed to specific IP addresses and even allow creation of subdomains. For example, abc.domain.com could be directed to 62.219.3.128.
A Records can accept IP numbers only.
CNAME - stands for "canonical name", allowing users to define canonical addresses for specific needs and ease of use. For example, If a CNAME record isn’t defined properly users who type www.example.com will not manage to open the website.
However if they type example.com the website will work fine.
CNAMEs accept only textual records, no IP numbers are allowed.
MX Records - The MX records are "responsible" for mail access and stand for "mail exchange". This kind of record also accepts a priority setting, allowing you to have backup mail servers.
MX Records can accept textual data only! No IP will be accepted.
Also, usually there will be no prefix to the domain. Writing "mail", for example, as prefix will result the following mailbox structure:name@mail.domain.com instead of simply name@domain.com
Mail server forwarding
In some cases, the user is required to point their MX records to a different mail server.
If so, the target service provider is responsible for providing you with sufficient information about the required MX records. You may delete the old records and create new ones.
Please notice that some providers require a period (.) to be added after each record - we do not require so.
Notice
Most service providers direct a domain to a website using two A Records - one for direct access, one for WWW.
In our system, the access using WWW is handled with a specific CNAME, therefore pointing the WWW access to the website using A Record won't work.
Important! All modifications to domain records (A RECORD, DNS, etc.) are updated within 72 hours after the change is made.
Adding a Sub-Domain
A sub-domain is an address derived from the domain name in the following format:
subdomain.example.com. A sub-domain can be linked to a site located in the same account or to another address.
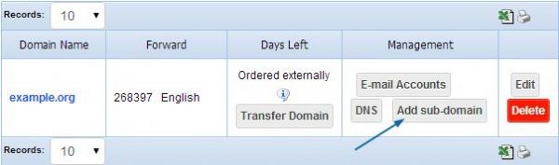
To create a sub-domain, click on Domain >> All domains under the account >> Add Sub-Domain.


-
Enter the sub-domain in the window that appears
-
Select the site from a list or insert an address to which users will be forwarded, if the sub-domain is not linked to any site in the system.
-
Click Apply
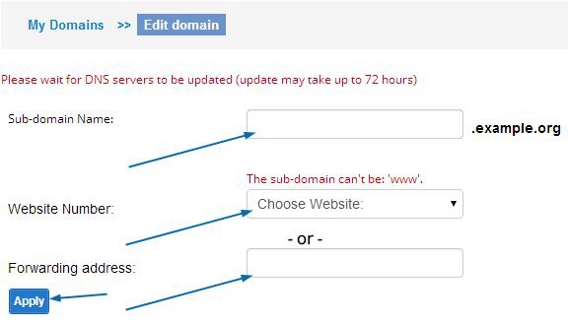
To forward the sub-domain to a site external to the server, fill the forwarding address field instead of selecting a site code.

 English
 Español
 Deutsch
 Français
 Pусский
 العربية
 हिंदी
हिंदी Italiano
 日本の
日本の Português
 עברית
עברית