This tutorial will guide you through the initial steps necessary to set up your online store - from creation of categories and products and up to fine-tuning your store's settings. The entire process is quite simple and should not take too much time and effort.
The left-side menu contains a collection of links to articles dedicated to specific e-commerce tools available in the online store.
Entering Store Manager
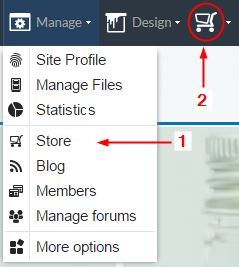
To enter the e-commerce module for the first time, click on
Manage >>
Store on the admin panel's top toolbar. As soon as the first product has been uploaded, a new shopping cart icon will appear on the toolbar allowing you to enter the store management in a single click.
Uploading Products
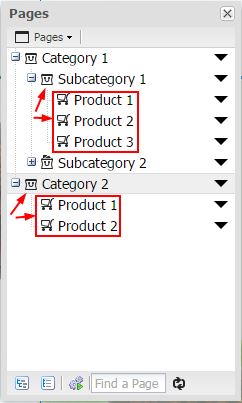
A proper structure of an online store suggests creation of major product categories, which contain lower-level subcategories or single product pages. Mixing product categories, single products and regular content pages within the same category is strongly discouraged.
 Click here for more information on uploading products and product categories.
Product Settings
To set up product settings, such as price, shipping conditions, product image, etc., click on
Store >>
Manage store >>
Manage products.
Then click on
Settings >>
Edit product settings next to the relevant product.
Click here for more information on product settings.
Store Settings
Before publishing your e-commerce website, it is recommended to set up the necessary settings to make sure your online store works smoothly. You can always go back and update your settings, if needed. The general settings of your store include the store's terms and conditions, payment options, shipping settings, stock management options, tools for managing registered users and much more.
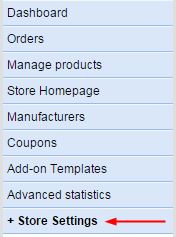
To set up your store, go to
Store >>
Manage store >>
Store settings.
Congratulations! Your online store is good to go. We recommend that you place some tentative orders to become familiar with the way it works and see the automatic notifications sent by the system to the store owner and to the buyer.
Frequently Asked Questions
-
I have received a notification about a new order placed in my e-commerce website. Where can I manage the new orders?
For a detailed tutorial on order management click here.
-
What are the available options of collecting payment from my customers?
As soon as your customer adds a product to the shopping cart and proceeds to checkout, he will be offered a range of payment methods predefined by you in the store's general settings. Check the available options in Store >> Manage store >> Store settings >> Payment methods.
-
Can I set up shipping options for a product?
Of course, there is a variety of product shipping settings. For more details click here.
-
Can I customize the appearance of product and category pages?
E-commerce product and category pages are displayed with default templates, which can be easily customized at your discretion. To change the looks of your products, go to Store >> Manage store >> Store settings >> Product Page Design (click here for more details). To customize your product categories, go to Store >> Manage store >> Store settings >> Advanced Design.
-
How can I customize the customer details form?
Go to Store >> Manage store >> Store settings >> Custom order form.
-
I don't receive notifications about new orders in my store. Why?
Most probably, you have not agreed to receive automated messages while setting up your profile. To fix this, click on the Account icon in the top right corner >> User settings >> Tick the checkbox suggesting that you agree to receive notifications about your subscription and products >> Save the changes by clicking Apply.

 English
 Español
 Deutsch
 Français
 Pусский
 العربية
 हिंदी
हिंदी Italiano
 日本の
日本の Português
 עברית
עברית