In this section, you can define a variety of general settings relevant to the entire store. These settings are relevant to a specific language, if your website is multilingual - i.e. you can define separate settings for each of your site's languages.
To set the settings, first, go to the General Settings area:
Store >> Manage Store >> Store Settings >> General Settings.
Switching Between Store and Catalog Modes
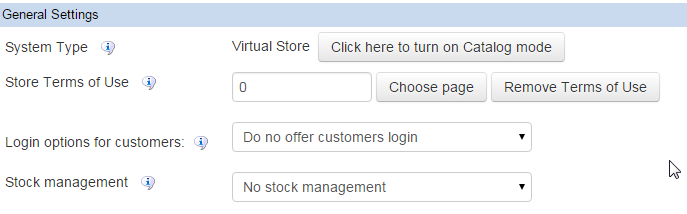
The first setting appearing at the top of the screen is System Type - it allows you to define your e-commerce website as a store or as a product catalog. The difference between the two is that the store allows customers to check out and purchase a product online, whereas the catalog only displays the products. You can switch between the two modes by clicking on
"Click here to turn on Catalog/Virtual Store mode". The change is instant - the moment you turn on the Catalog mode, no "Add to Cart" buttons or links (generated by the system) will be displayed. This action does not require clicking on the
Apply button.
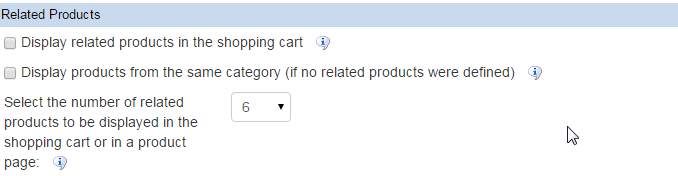
Related Products
The system allows displaying related products on a product page, as well as in the shopping cart before the checkout.
Display related products in the shopping cart - ticking this option will turn on display of products related to the products added to the shopping cart right on the shopping cart page.
Display products from the same category - this option enables display of products from the same category in the product page. This option is enabled, if no related products were defined manually. Important note: if you are using a customized product page template, please make sure you insert the relevant code for the related products to be displayed on the page.
Select the number of related products to be displayed in the shopping cart or in a product page - this setting defines how many related products will be displayed on the product page or in the shopping cart.
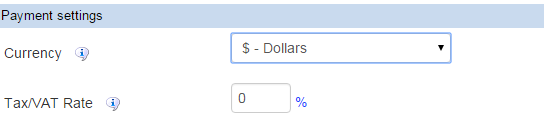
Currency and Tax Settings
In this section, you can define a default currency for your online store and set tax/VAT percentage, if required by the local laws in your state/country.
You can select the relevant currency time in the
Currency dropdown box.
Tax/VAT can be defined in the
Tax/VAT Rate field.
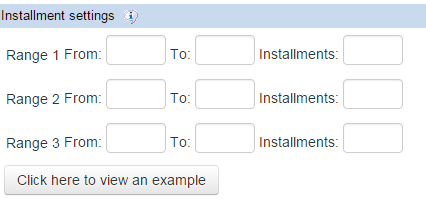
Installment Payment Settings
In case you choose to charge your customers' credit cards online, and your credit company allows installment payment plans, you can offer your customers a range of installment plans based on the total transaction sum. You can click on the relevant button to see a live example.
Store Terms of Use
In order to set up your store's terms of use, first of all, create a new content page and specify your store's terms and conditions. When the page is ready, go to
Store Settings >> General Settings >> Store Terms of Use. Click on the
Choose page button, find the Terms of Use page and click on it - the page's serial number will appear in the box. Click on
Apply to save the settings.

Text Notifications About Store Activity
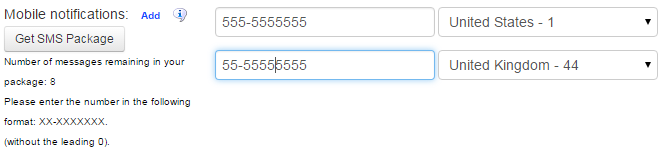
The system offers an instant text notification service, which can keep the store owner informed about every new order in their store - directly to their mobile phone. For security reasons, the text message does not contain any customer or order details, but it is used to inform the store manager right away that there is a new order waiting to be handled.
To enable this service, you should first purchase a text notification package.
Once you have a package of text messages in your inventory, you can add one or more mobile phone numbers in the store's general settings. Click on
Apply to save the settings.
User Login Options
The system allows integration of your registered users database into the e-commerce module, which can help your registered users save their purchase history and improve their shopping experience.
You can choose one of the following options:
-
User login not required - anyone can purchase from the site without the need to log in.
-
User login required prior to purchase - one has to sign up/sign in in order to proceed to purchase.
-
User login optional, but not required - you can offer your visitors to sign up/sign in to improve their shopping experience, but it is not a necessary requirement for ordering from the store.
If the second or the third option is chosen, username and password fields will be added to the order form the user must fill out prior to purchase. Please click on
Apply to save the settings.

Stock Management
The stock management mechanism allows automatic blocking of sales for products that have run out of stock.
To enable this option, go to General Settings, select
"Automated stock management" in the Stock management dropdown box, and click on
Apply to save the changes.

Please note that when you select payment methods for your e-commerce website, you can tick the stock regulation checkbox next to each payment option - each time this payment method is used, the stock amount for the purchased products will be decreased automatically. This option is mostly relevant to stores that charge their customers online, when the transactions are processed immediately.
In addition, keep in mind that if the stock management is enabled, the default stock amount for each product is zero. Make sure you update stock quantities for every product before enabling the stock management, otherwise your products won't be available for sale.

 English
 Español
 Deutsch
 Français
 Pусский
 العربية
 हिंदी
हिंदी Italiano
 日本の
日本の Português
 עברית
עברית