This tutorial elaborates on the different elements Apps category of the side toolbar.
Map
It is possible to quickly add a Google street map by dragging the Map tool from the side toolbar to the desired position on the page.
Clicking the element after positioning it will open up its contextual menu:
-
Style - Enables you to style the element, e.g. set up a border, round the corners, etc.
-
Replace - Clicking Replace allows you to change the default street address. You can set various map options before applying the settings.
-
Fit to screen width - Fits the element to the width of the screen, as its name suggests.
-
Animation - Allows you to animate the element, when the page is loading, for example, have it slide into its designated position.
Search
This tool allows embedding a customized search field in any part of a web page.
To customize the appearance of the search box, click on it, then select
Style and set up search field and button settings.

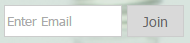
Mailing List
The Mailing List, as its name suggests, is a tool that allows site visitor to sign up for the site's newsletters. Plainly speaking, it is a field where the visitor can enter his email address to join the mailing list. To manage your site's mailing list press on
Manage >> More options >> Mailing List.
Click here for more details about the Mailing List tool.
PayPal - Buy Now Button
In case you want to enable your customers to arrange payments via PayPal, you can drag the PayPal button from the side toolbar to the desired position on the page. A click on the button will lead to a secured PayPal page, where the visitor can proceed with the payment.
Clicking the element after positioning it will open up its contextual menu:
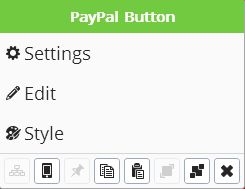
Settings - This option allows you to apply various settings to the PayPal button:
-
PayPal Account Email - This is the email you registered with PayPal.
-
Item Name - Name of the item you are offering for sale.
-
Item Number - (Optional) item number, assuming it has one.
-
Price - The item’s price.
-
USD - Currency selector.
-
Shipping - Shipping costs.
-
Tax Rate - Tax rate in percentages to be added to the final tally.
-
Country and Language - Sets the language for the PayPal payment screen.
Edit - This option enables you to change the default text on the button. You can also do that by double-clicking on the button.
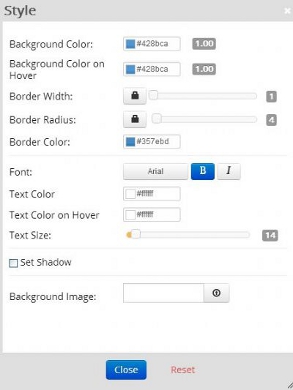
Style - Style opens up the current element style window. In this window, it is possible to change many of the design settings.
-
Background color - Defines the background color, tone and opacity.
-
Background color on hover - Defines the background color while hovering with the cursor.
-
Border width - Sets the border width.
-
Border radius - Rounds the corners of the border.
-
Border color - Sets the border color.
-
Font - Sets the text font.
-
Text color - Sets the text color
-
Text color on hover - Set the text color while hovering with the cursor.
-
Text size - Sets the font size.
-
Background Image - Enables you to set the button’s background image.
NOTE - The following options are available once you select a background image:
-
Background Position: Positions the image in relation to the screen height and width.
-
Size:
-
Cover - Changes the image dimensions so that the entire background is covered. Crops the image if needed.
-
Contain - Changes the image dimensions so that it’s completely visible in the website.
Animation - Allows you to animate the element, when the page is loading, for example, have it slide into its designated position.
Flash (SWF)
It is possible to upload SWF files to your website by simply dragging the Flash icon from the Apps category in the side toolbar.
Clicking the element after dragging it will open up its contextual menu:
Language Bar
This element allows transition between the different languages in a multilingual website. The language bar offers a selection of flags corresponding to the site's languages, each flags linking to the relevant language. A click on the bar, after it was dragged to a page, will open up the language manager, where you can add and edit languages and flags.
Anchors
This tool allows creating anchors in any location within a web page. You can add a link and refer it to an anchor located in the same page - very useful for creating tables of content or directing a visitor to a specific area of the same page he is already browsing.
Custom Apps
This element enables adding almost any 3rd-party applet to a webpage.
Clicking the element after dragging it into the page will open up its contextual menu:
-
Replace - Here you can set up the name of the embedded element and paste the external code.
-
Style - Serves for defining the tool's design settings.
Category Content
The
Category Content tool enables you to display a summary of the content stored under a certain category.
A prerequisite for using this tool is existence of at least one content category containing at least one content page - you cannot import an empty category. In addition to that, you have to create an import template in advance.
To import a category, grab the Category Content element from the side toolbar and drag it to a desired position on your webpage >> Click on the tool and
Choose category >> Select the category you want to display >> Select the desired template, a number of records to be displayed, scrolling direction (optional) >>
Apply.
Tip: You can use the
Category Content tool for creating news scrollers -
click here for full details.
Content Templates
With this tool, you can create and store different kinds of content templates that can be used in your website according to your needs. You can use pre-made templates offered by the system or create your own ones. The following template types are available: repetitive content, category import, page templates, blog templates.
Provided you have already created a template, you can put it in the desired location by dragging the Content Template tool from the side toolbar >> Left-click >>
Choose templates >> Select the relevant template from the list >>
Save >> Refresh the page to view the template.
Changing Element Position
You can change the position of any element by left-clicking on it, holding and dragging it around the page.

 English
 Español
 Deutsch
 Français
 Pусский
 العربية
 हिंदी
हिंदी Italiano
 日本の
日本の Português
 עברית
עברית